


Engine: 2JZ-GE (NA, VVT-i 1998+)
Part of the Toyota JZ family. NA-T conversions
Modeled power and torque
Modelled estimate, not a dyno result.
Modeled estimate, not a dyno measurement. Real results vary with fuel, weather, dyno type and build.
Stock is anchored to the factory rating (222 hp at 6000 rpm, 209.8 lb-ft at 4800 rpm); the curve shape between peaks is modeled. Intake + exhaust + tune (pump fuel): Typical NA gains come mostly above mid-rpm.
2JZ-GE (NA, VVT-i 1998+) data
- Load sensing
- mixed by year/market
- O2 sensor
- Not yet sourced
- Closed loop
- Not yet sourced
- Block
- cast iron (skeleton structure, curved walls)
- Rods / pistons
- hot-forged, knock-pinned caps, plastic-region bolts; VVT-i: high-strength vanadium steel · aluminium, resin-coated skirts; oil jet sprays each piston underside
- Reported limit
- Not yet sourced
- Factory
- Denso top-feed · 315 cc/min
- Impedance
- high (saturated)
- Direct-fit upgrades
- 4 maker-listed
- Knock
- Toyota 89615-22040 | Toyota 89615-22030
- MAP / MAF
- not applicable: MAF-metered
- O2 (upstream)
- Toyota 89465-14120 | Toyota 89465-19605 | Toyota 89465-19625 | Toyota 89465-14140 (California)
Platform background
The A80 Supra (1993-2002) carries the 2JZ-GE (NA) or 2JZ-GTE sequential twin turbo. US cars use a two-connector Toyota ECM under the passenger footwell, MAF metering, low-impedance injectors with a solenoid resistor (turbo), a fuel pump ECU and, on turbo models, a TRAC sub-throttle. Turbo cars got Toyota's first 6-speed manual (developed with Getrag) and ECT-iS automatics. This page gives the 1995 US 2JZ-GTE and 1997 US 2JZ-GE ECM terminal assignments from Toyota repair manuals.
Factory ECU
- 1995 US: DLC1/DLC2 with Toyota hand-held tester
- 1997 US manual: DLC3 with OBD-II scan tool
The factory ECM is a conventional Toyota MAF-based unit with closed-loop narrowband control and knock feedback. Toyota's reference data lists air-fuel feedback active at steady 2,500 rpm and knock feedback active on sudden throttle, which confirms the strategy is closed loop only at light and steady load. Immobilizer fitment was not confirmed from the sources used here; check the specific market and year.
Factory ECU: harness cross-reference
From the factory ECU each listed harness plugs into. The factory ECU is unplugged, not modified. Check the label and part number on your own ECU before ordering.
- ECU family
- Toyota 89661-series
- Applies to
- JZA80 Supra 2JZ-GTE/GE non-VVTi (1993-97); manual
- Not for
- VVT-i JZA80 (1997+); automatic
No source-supported part number. Non-VVTi vs VVTi electronics differ significantly.
- ECU family
- Toyota 2JZ-GE VVT-i
- Applies to
- 1998-2001 Aristo, GS300, IS300, SC300, Supra NA; auto/manual
One SKU across several chassis; ECM codes not verified.
- ECU family
- Toyota 2JZ-GE
- Applies to
- 1992-97 SC300 / 1993-97 Supra NA manual
- ECU family
- Toyota 2JZ-GE
- Applies to
- 1992-97 SC300 / Supra NA automatic
Factory ECU pinout
Each connector face drawn from the OEM service manual's pin data, with every terminal's function and wire colour where the manual prints it.
Toyota Supra (A80) 2JZ-GE ECM, 1997 US (OBD-II)
The Toyota Supra (A80) 2JZ-GE ECM, 1997 US (OBD-II) uses 2 connectors with 120 cavities. This page draws each face from the OEM figure and lists the 55 terminals the OEM table documents, with wire colours where the manual prints them.
1997 (1997 US manual RM502U) · US · 2 connectors, 120 cavities · 55 terminals sourced
Looking into the ECU's connector. The harness plug seen from its wire side has the same layout.
How the OEM figure is oriented
ECU header side, as drawn in the OEM figure. Side confidence: medium.| Pin | Function | Type | Wire | Notes |
|---|---|---|---|---|
| A1 | IGSW, ignition switch signal | Power | B-W | (medium confidence) |
| A2 | SP1, vehicle speed sensor | Sensor signal | P | (medium confidence) |
| A6 | W, check engine warning lamp | Outputs | L-B | (medium confidence) |
| A8 | SDL, serial data link | Comms / diag | G | (medium confidence) |
| A12 | OD1, overdrive/transmission ECU link | Comms / diag | BR-B | (medium confidence) |
| A15 | ELS, electrical load signal | Sensor signal | R-Y | (medium confidence) |
| A20 | TE1, diagnostic test terminal | Comms / diag | Y-L | (medium confidence) |
| A22 | FPC, fuel pump control | Outputs | V-W | (medium confidence) |
| A23 | ACMG, A/C magnetic clutch control | Outputs | W-G | (medium confidence) |
| A24 | M-REL, EFI main relay control | Outputs | B-Y | (medium confidence) |
| A30 | OX3, oxygen sensor 3 | Sensor signal | R-L | (medium confidence) |
| A31 | +B, ECM main power | Power | B-R | (medium confidence) |
| A33 | BATT, battery backup supply | Power | B-W | (medium confidence) |
| A34 | AC, A/C signal | Sensor signal | L-R | (medium confidence) |
| A36 | HT3, O2 heater 3 | Outputs | BR-W | (medium confidence) |
Our drawing from published pin data; not an OEM drawing. Layout from the OEM face view (medium confidence). Confirm against the factory manual for your exact year and market before cutting or pinning wires.
Looking into the ECU's connector. The harness plug seen from its wire side has the same layout.
How the OEM figure is oriented
ECU header side, as drawn in the OEM figure. Side confidence: medium.| Pin | Function | Type | Wire | Notes |
|---|---|---|---|---|
| B4 | NE2, second crank position signal | Crank / cam | B | (medium confidence) |
| B5 | NE2-, second crank signal return | Crank / cam | W | (medium confidence) |
| B7 | G-, cam/crank pickup common return | Crank / cam | G | (medium confidence) |
| B15 | #60, injector cylinder 6 | Injector | R-B | (medium confidence) |
| B16 | #50, injector cylinder 5 | Injector | R | (medium confidence) |
| B17 | #40, injector cylinder 4 | Injector | R-W | (medium confidence) |
| B18 | #30, injector cylinder 3 | Injector | R-G | (medium confidence) |
| B19 | #20, injector cylinder 2 | Injector | R-Y | (medium confidence) |
| B20 | #10, injector cylinder 1 | Injector | R-L | (medium confidence) |
| B25 | G2, cam position signal 2 | Crank / cam | W | (medium confidence) |
| B26 | G1, cam position signal 1 | Crank / cam | R | (medium confidence) |
| B27 | NE, crank position signal | Crank / cam | B | (medium confidence) |
| B28 | EVG, MAF meter signal ground | Sensor 5 V / ground | BR | (medium confidence) |
| B32 | ISC4, idle speed control valve | Outputs | R-B | (medium confidence) |
| B33 | ISC3, idle speed control valve | Outputs | L-B | (medium confidence) |
| B34 | ISC2, idle speed control valve | Outputs | G-W | (medium confidence) |
| B35 | ISC1, idle speed control valve | Outputs | Y-B | (medium confidence) |
| B39 | ACIS, intake control VSV | Outputs | G-Y | (medium confidence) |
| B41 | VC, 5 V sensor supply | Sensor 5 V / ground | L-R | (medium confidence) |
| B43 | VTA1, throttle position sensor | Sensor signal | Y | (medium confidence) |
| B44 | THW, engine coolant temperature | Sensor signal | L-Y | (medium confidence) |
| B45 | THA, intake air temperature | Sensor signal | P-L | (medium confidence) |
| B47 | OX2, oxygen sensor 2 | Sensor signal | R-L | (medium confidence) |
| B48 | OX1, oxygen sensor 1 | Sensor signal | W | (medium confidence) |
| B49 | KNK2, knock sensor 2 | Sensor signal | W | (medium confidence) |
| B50 | KNK1, knock sensor 1 | Sensor signal | W | (medium confidence) |
| B57 | IGT, igniter trigger (distributor ignition) | Ignition | R-W | (medium confidence) |
| B58 | IGF, ignition confirmation | Ignition | R-Y | (medium confidence) |
| B64 | IDL1, throttle idle contact | Sensor signal | R-B | (medium confidence) |
| B65 | E2, sensor ground | Sensor 5 V / ground | W-B | (medium confidence) |
| B66 | VG, mass air flow meter signal | Sensor signal | Y-R | (medium confidence) |
| B69 | E1, ECM ground | Ground | BR | (medium confidence) |
| B71 | HT1, O2 heater 1 | Outputs | G | (medium confidence) |
| B72 | HT2, O2 heater 2 | Outputs | B-Y | (medium confidence) |
| B73 | FPU, fuel pressure up VSV | Outputs | W-L | (medium confidence) |
| B74 | EVAP, EVAP VSV | Outputs | V | (medium confidence) |
| B75 | EGR, EGR VSV | Outputs | P | (medium confidence) |
| B76 | NSW, park/neutral position switch | Sensor signal | B-W | (medium confidence) |
| B77 | STA, starter signal | Sensor signal | B | (medium confidence) |
| B80 | E01, power ground | Ground | BR | (medium confidence) |
Our drawing from published pin data; not an OEM drawing. Layout from the OEM face view (medium confidence). Confirm against the factory manual for your exact year and market before cutting or pinning wires.
Coverage, year splits and safety
Covers the 1997 US 2JZ-GE ECM connectors A and B from the RM502U 'Terminals of ECM' table. Wire colours are the terminal-side colour. 1993-95 OBD-I and VVT-i ECUs are not covered.
Source notes: 2JZ-GTE rows are from the 1995 US-model repair manual 'Standard value of ECM terminals' (connectors E9 'B' and E10 'A'); that table gives terminal symbols but not wire colours or every pin. 2JZ-GE rows with wire colours are from the 1997 RM502U 'Terminals of ECM' table (US, OBD-II) as reproduced by toyota-supra.de; wire colours shown are the terminal-side colour. Function descriptions for TE1/TE2, W, OD1 and SDL are interpretations of Toyota's terminal symbols. Japanese-market ECUs (JZA80 RZ/GZ, Aristo) and 1996-98 US 2JZ-GTE ECUs are not covered; obtain the matching Toyota EWD/repair manual (e.g. 1997 Supra RM502U and its EWD) before wiring.
Safety: disconnect the battery before working on the ECU harness, and confirm each terminal with a meter against your own car's manual before cutting or pinning wires.
Plug-and-play harness
A plug-in harness built for the Haltech Nexus S3 pinout is listed for this vehicle. The ECU2 follows that published pinout, so the factory ECU is unplugged and the ECU2 plugs into the car's own loom. Nothing is written to the factory ECU. Pin-compatible per the published S3 pinout, not yet fit-tested.
| Maker | Harness | Fits | Link | |
|---|---|---|---|---|
 | Toyota Supra JZA80HT-186369 | JZA80 Supra 2JZ-GTE/GE non-VVTi (1993-97); manual | $535Lowest | Maker ↗ |
 | All 1998 - 2000 Toyota Aristo 2JZ-GE VVT-iBF29083-S3 | 1998-2001 Aristo, GS300, IS300, SC300, Supra NA; auto/manual | $960 | Maker ↗ |
| Manual 1993 - 1997 Toyota Supra 2JZ-GEBF29124-S3 | 1992-97 SC300 / 1993-97 Supra NA manual | $1,200 | Maker ↗ |
| Auto 1993 - 1997 Toyota Supra 2JZ-GEBF29214-S3 | 1992-97 SC300 / Supra NA automatic | $1,200 | Maker ↗ |
| Wire-in | Universal flying lead or re-terminated factory harness | Any engine (terminate to ECU2's two Superseal 34 connectors) | Universal harness from $405 | Maker ↗ |
Nexus S3 Plug n Play Adapter Harness Toyota Supra JZA80
- Plugs into
Toyota 2JZ non-VVTi ECU (Supra JZA80)
- ECU
- Toyota 89661-series
- Confidence
- low
No source-supported part number. Non-VVTi vs VVTi electronics differ significantly.
- Fits
- JZA80 Supra 2JZ-GTE/GE non-VVTi (1993-97); manual
- Exclusions
- VVT-i JZA80 (1997+); automatic
- SKU
- HT-186369
- Maker fitment
- Toyota Supra JZA80 2JZ non-VVTi; manual only
- Maker notes
- kit HT-213324 USD 2800
Boomslang plug-and-play harness for Haltech Nexus S3 - All 1998 - 2000 Toyota Aristo 2JZ-GE VVT-i
- Plugs into
Toyota 2JZ-GE VVT-i ECU
- ECU
- Toyota 2JZ-GE VVT-i
- Confidence
- low
One SKU across several chassis; ECM codes not verified.
- Fits
- 1998-2001 Aristo, GS300, IS300, SC300, Supra NA; auto/manual
- SKU
- BF29083-S3
- Maker fitment
- Lexus GS300; Lexus IS300; Lexus SC300; Toyota Aristo 2JZ-GE VVT-i; Toyota Supra 2JZ-GE (Auto/Manual); selector years 1998-2001; SKU label: All 1998 - 2000 Toyota Aristo 2JZ-GE VVT-i
- Maker notes
- separate SKUs exist for other Nexus models (-S2/-R3/-R5/-T1/-T2); 1998-2001
Boomslang plug-and-play harness for Haltech Nexus S3 - Manual 1993 - 1997 Toyota Supra 2JZ-GE
- Plugs into
Toyota 2JZ-GE ECU (non-VVT-i, manual)
- ECU
- Toyota 2JZ-GE
- Confidence
- low
- Fits
- 1992-97 SC300 / 1993-97 Supra NA manual
- SKU
- BF29124-S3
- Maker fitment
- Lexus SC300; Toyota Supra 2JZ-GE (Manual); selector years 1992-1997; SKU label: Manual 1993 - 1997 Toyota Supra 2JZ-GE
- Maker notes
- separate SKUs exist for other Nexus models (-S2/-R3/-R5/-T1/-T2); manual 1993-97
Boomslang plug-and-play harness for Haltech Nexus S3 - Auto 1993 - 1997 Toyota Supra 2JZ-GE
- Plugs into
Toyota 2JZ-GE ECU (non-VVT-i, auto)
- ECU
- Toyota 2JZ-GE
- Confidence
- low
- Fits
- 1992-97 SC300 / Supra NA automatic
- SKU
- BF29214-S3
- Maker fitment
- Lexus SC300; Toyota Supra 2JZ-GE (Auto); selector years 1992-1997; SKU label: Auto 1993 - 1997 Toyota Supra 2JZ-GE
- Maker notes
- separate SKUs exist for other Nexus models (-S2/-R3/-R5/-T1/-T2); auto 1993-97
Haltech and Boomslang are trademarks of their respective owners. GAINS is not affiliated with or endorsed by them.
Your GAINS system for this car · pre-release
ECU2 for the Supra MK4 A80
Planned with the same rules as the configurator for this car's 6 cyl · port injection · cable throttle. The factory ECU is unplugged and replaced; nothing is written to it.

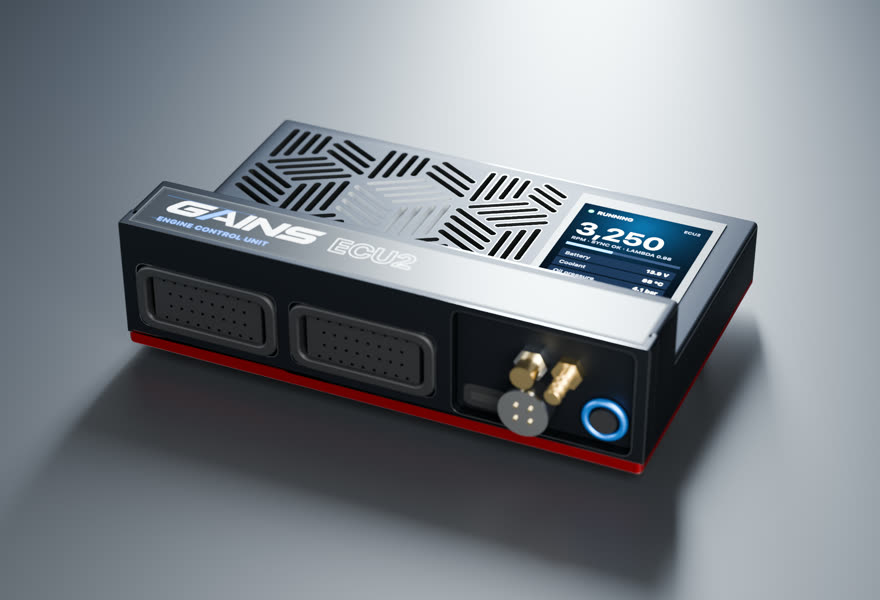
- Price TBA
ECU2Engine controller
6 cyl · port injection · cable throttle
Full sequential fuel and spark for this 6-cylinder on a cable throttle, with the wideband built in.
in designEst. availability: April 2027
Add PDM2 to switch and protect chassis loads (pumps, fans, lights, accessories). Add it in the configurator →
Track days? Add the Telemetry Dongle Pro for 25 Hz GPS lap timing; it plugs into the OBD-II port, and your phone is the dash. Plan it in the configurator →
What you get
- A screen on the ECUA 2.4-inch, 500-nit display in the lid, readable in a footwell.
- Faults in plain words"Coolant temp sensor open circuit.
- S3-style harnessesConnector A and C pin functions follow the published Nexus S3 wiring diagram.
- Powered CAN portA sealed 4-pin port on the insert carries 12 V and CAN for the PDM2 and GAINS displays: one cable per accessory.
- GAINS insideThe on-ECU adaptive layer, the app, logging and your limits.
How it wires in
- Haltech S3 plug-in harness1 listed · from $535 USD listHT-186369
- Factory-connector → S3 adapter3 listed · from $960 USD list
- Wire-inAlways possible
Pin-compatible per the published S3 pinout, not yet fit-tested. Every harness option for this car ↓
ECU2 is in design; specifications may change. All GAINS hardware is pre-release concept design; nothing is for sale yet and no application is validated on a vehicle. Harness fitment is from published pinouts and not yet fit-tested.
Swap guides
The 2JZ-GE (NA, VVT-i 1998+) family in other cars
How GAINS approaches the Supra MK4 A80
Our starting method for this engine, as foundations first: get it running and drivable, then learn fuel, then the hardware-specific strategies. It is a methodology outline, not a validated calibration.
- 1Base map and first startplanned
Start from displacement, injector data and the sensors fitted, then let the first-start learner settle cranking, idle and warm-up before any load work. The goal is a safe, running engine, not a finished calibration.
- 2Lambda targets and VE learningclosed loop on GAINS ECUs
Air-fuel targets come from your goal (street, track, economy). The ECU then learns its fuel table cell by cell from the onboard wideband inside a signed envelope, and you approve promoting what it learned into the base map.
- 3Cam phasing (VVT)gated
Begin with conservative overlap. Cam targets per load cell are then chosen with torque and knock in mind, keeping idle and cold overlap low for stability. Widening cam authority follows the same evidence-gated path as spark.
- 4Drivability foundationsplanned
Pedal map, tip-in and decel fuel, idle control, cold start and warm-up enrichment: the tables tuners spend hours on after the main map. Each is a strategy in the knowledge engine with its own limits.
- 5Factory load sensingfactory reference
What the factory ECU measures load with: varies by year/market (low confidence); Forum: US/UK 2JZ-GE (Supra NA, SC300, GS300) uses MAF; JDM 2JZ-GE MAP. One poster claims Lexus used MAF in all markets. Unverified.
- 6Wideband sensorhardware
factory O2 type not yet sourced; plan on a Bosch LSU 4.9 for the GAINS ECU's built-in controller
Drivetrain
Chassis integration
Second throttle valve with its own position sensor (VTA2) and idle contact (IDL2) wired to the engine ECM
Sourced2When fitting a standalone ECU, the TRAC sub-throttle is normally fixed open or removed, the ECM's A/C and speed inputs must be recreated if those features are to keep working, and the fuel pump ECU needs either an FPC signal or a bypass. The EFI main relay is switched by the ECM (M-REL), so a replacement ECU must provide or bypass that control.
Tuning notes
61-75 kPa (8.8-10.8 psi) at 5,600 rpm or above, full throttle, first gear
Sourced4On the turbo car, the usual sequence is boost and fuel first (pump wiring, injectors), then either a piggyback for the factory ECM or a full standalone, often combined with a single-turbo conversion that deletes the sequential VSV network. Keep knock monitoring active and log wideband lambda; the factory narrowband sensors give no useful information at full load.
Popular swaps
NA-to-turbo conversions on the A80 need the turbo engine's ECM and harness or a standalone, the turbo fuel system (injectors, resistor pack or high-impedance replacements, pump ECU), intercooler piping, and usually the V160 or a strengthened gearbox. Alternative-engine swaps into the A80 are possible but are outside the scope of OEM documentation.
Other Supra MK4 A80 guides
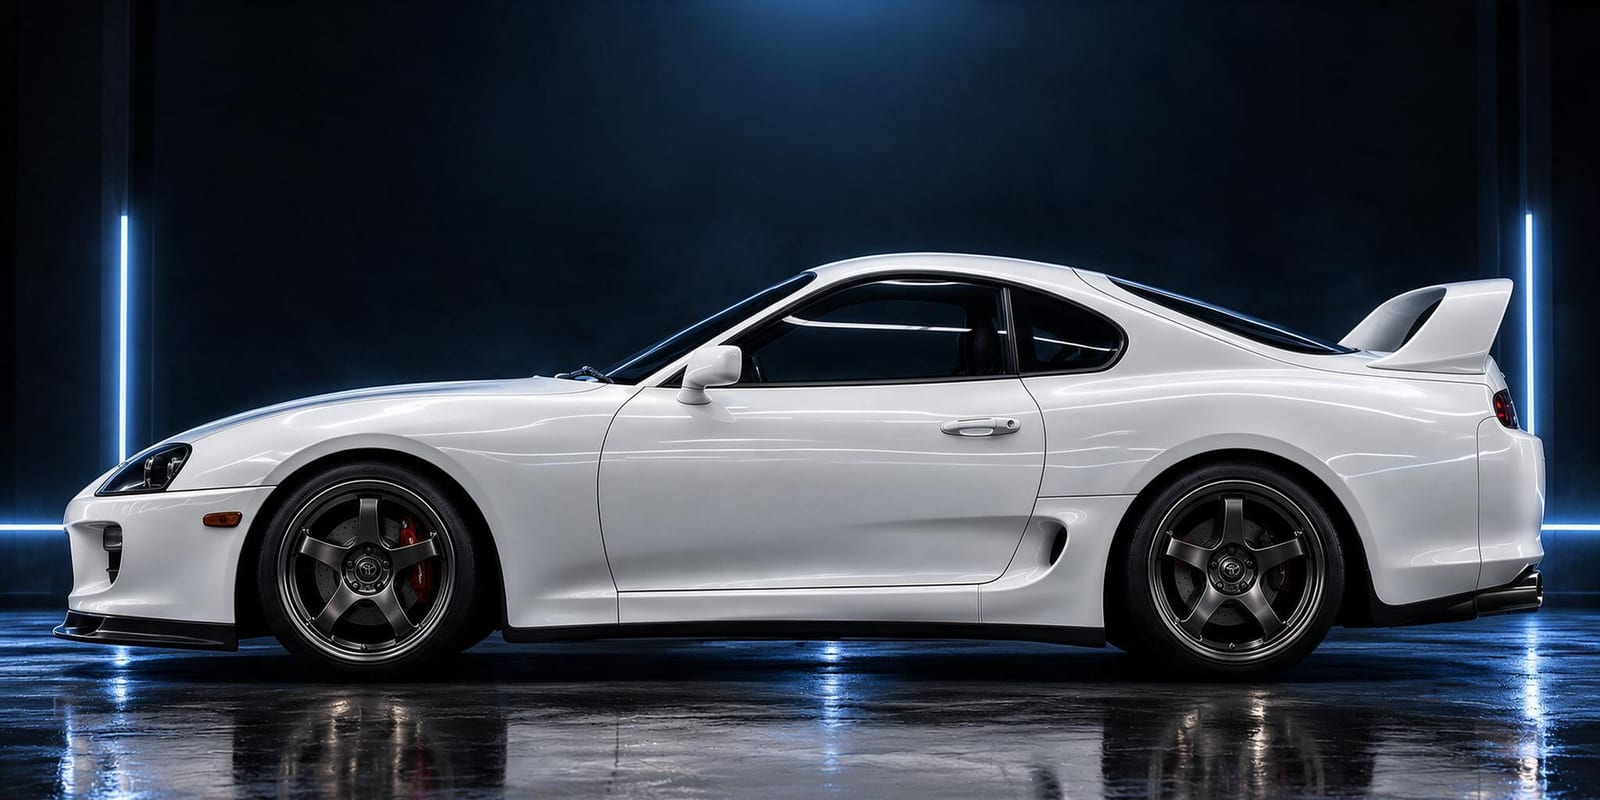
GAINS on the Supra MK4 A80
ECU2
Designed so your phone is the laptop, keypad and dash
The GAINS app is designed to handle tuning, logging, gauges and switch inputs over Bluetooth, so the system needs no separate CAN keypad or display. Keypad, dash and logging views are planned; the iOS prototype runs on simulated data today.
Wideband, IMU and logging built in
An onboard Bosch LSU 4.9 wideband controller, a 6-axis IMU and onboard logging are designed into the ECU rather than sold as add-on modules.
Modular, so you buy what the engine needs
This engine runs on ECU2. PDM2 (power, body and gearbox) is optional and connects over ECU2's powered CAN port; the Telemetry Dongle Pro adds GPS lap timing from the OBD-II port.
Calibration that keeps learning
Instead of a fixed map that drifts as parts and conditions change, the ECU keeps adapting its fuel trims within limits you can see and approve in the app.
Adaptive tuning strategies
- VE learning closed loop on GAINS ECUs
Learns the fuel table from the onboard wideband as you drive, cell by cell, inside a signed authority envelope. Learned trims are promoted into the base map without a step in fuelling.
- Goal-based lambda targets closed loop on GAINS ECUs
Sets air-fuel targets from your goal (economy, response, power, safety margin) instead of a single fixed table.
- Knock protection protection
Listens for knock on a dedicated knock processor, pulls timing at once and restores it slowly. It only ever reduces advance.
- Warm-up, cranking, idle and transient fuel planned
The same learning approach applied to the tables tuners spend hours on after the main map is done.
- Spark advance and boost authority gated
Widening ignition advance or boost is never automatic. It stays an expert or dyno decision until validated knock detection exists for the engine family.
Already running another ECU? In advisor mode the same strategies read your logs and recommend exact table changes with the reasoning, which you apply in your ECU vendor's own software.
GAINS hardware is pre-release concept design. Simulated results only; nothing is validated on a vehicle yet.
Frequently asked
Where is the ECU on a MK4 Supra?
Under the passenger-side floor carpet behind a protective cover. It uses two bolt-locked connectors (A and B).27
Does the US MK4 Supra Turbo use a MAF or a MAP sensor?
A MAF meter with built-in air temperature sensor, plus a turbo pressure sensor read by the ECM.82
What is stock boost on a MK4 Supra Turbo?
Toyota's 1995 US check value is 61-75 kPa (about 8.8-10.8 psi) at 5,600 rpm or above at full throttle in first gear.4
Which ECU pins drive the 2JZ-GTE ignition?
On the 1995 US ECM, IGT1 to IGT6 are terminals B57 to B52 and the IGF confirmation is B58.2
Sources
Numbered as cited above. Hover or tap a citation chip to preview it.
- The Toyota JZ Engine Guide (Michael Knowling) · AutoSpeed (Web Publications Pty Ltd), archived copy · press · retrieved 2026-10-25
- Toyota Supra repair manual (1995 model), 2JZ-GTE engine troubleshooting: standard value of ECM terminals and ECM data (pages EG-510 to EG-513) · Toyota Motor Corporation (page images reproduced by toyota-supra.de) · service-manual · retrieved 2026-10-25
- Toyota Supra repair manual (1995 model), SFI system 2JZ-GTE (pages EG-258 on) · Toyota Motor Corporation (page images reproduced by toyota-supra.de) · service-manual · retrieved 2026-10-25
- Toyota Supra repair manual (1995 model), Turbocharger system 2JZ-GTE (pages EG-140 to EG-162) · Toyota Motor Corporation (page images reproduced by toyota-supra.de) · service-manual · retrieved 2026-10-25
- 75 Years of Toyota: Vehicle lineage, Supra (JZA80) · Toyota Motor Corporation · oem · retrieved 2026-10-25
- Toyota launches all-new Supra (press release, 24 May 1993) · Toyota Motor Corporation · press · retrieved 2026-10-25
- Toyota Supra A80 repair manual: Terminals of ECM, 2JZ-GE engine (based on RM502U, 1997) · Toyota Motor Corporation (reproduced by toyota-supra.de) · service-manual · retrieved 2026-10-25
- 1997 Toyota Supra Repair Manual (RM502U), SFI (2JZ-GTE) section · Toyota Motor Corporation (copy hosted at personal.tcu.edu) · service-manual · retrieved 2026-10-25
- Toyota Supra A80 repair manual index (sections incl. W58 and V160 manual transmissions, A340E automatic, TRAC, ABS) · Toyota Motor Corporation (reproduced by toyota-supra.de) · service-manual · retrieved 2026-10-25
Catalog data and evidence
- Catalog data, not yet expert-reviewed.
- No vehicle photos: illustrations only until licensed imagery is available.
- Catalog note: NA-T conversions
- E-932 Haltech S3 adapter harness page (sourced, high confidence)
- E-934 Boomslang identity (sourced, high confidence)
- E-935 Boomslang S3 catalog size (sourced, high confidence)
- E-900 Haltech Nexus S3 catalog (sourced, high confidence)
- E-941 S3 engine harness availability (inferred, medium confidence)